This post contains affiliate links.
Ideally, nail polish is designed to quickly dry off on itself. Unlike gel polish, they do not require exposure to UV/LED light to cure. They are very easy to apply and remove and they are incredibly effective. But even with that, sometimes the polish will just not dry on acrylics. Have you ever considered why?
You could be using a sticky topcoat. Wipe off the sticky layer after application and wait for the polish to dry. If it’s still not curing, check the label on your polish for the expiry date. Applying a thick layer will also make your polish too hard to cure. Always apply a thin layer at a time.
Frankly speaking, nail polish naturally dries off without any further ado. If the problem is on a sticky topcoat, I would recommend investing in a no wipe brand. They are easily and affordably available in most online shops and beauty supply stores.
If you are trying to apply polish to your acrylic nails at home but it is not coming off well, this guide will point you to everything you need to know first.
Table of Contents
What Do You Do If Your Nail Polish Won’t Dry?
Normally, it can take up to 60 minutes for your nail polish to cure. Yes, one good hour! But don’t let your heart be troubled. Especially if you need to speed up the process so that you can dress up for that date. One of these options will come in handy and save your day!
1. Apply the Polish in Thin Layers
Always wipe off a bit of polish from your applying brush using the side of your polish bottle. Swipe one thin layer and give it a few seconds to dry off before applying another layer. Do this until you are satisfied with the thickness of the polish on your acrylic nails.
Optionally, the most convenient method is to apply a thin layer on each nail one after the other. Repeat another layer in the same order.
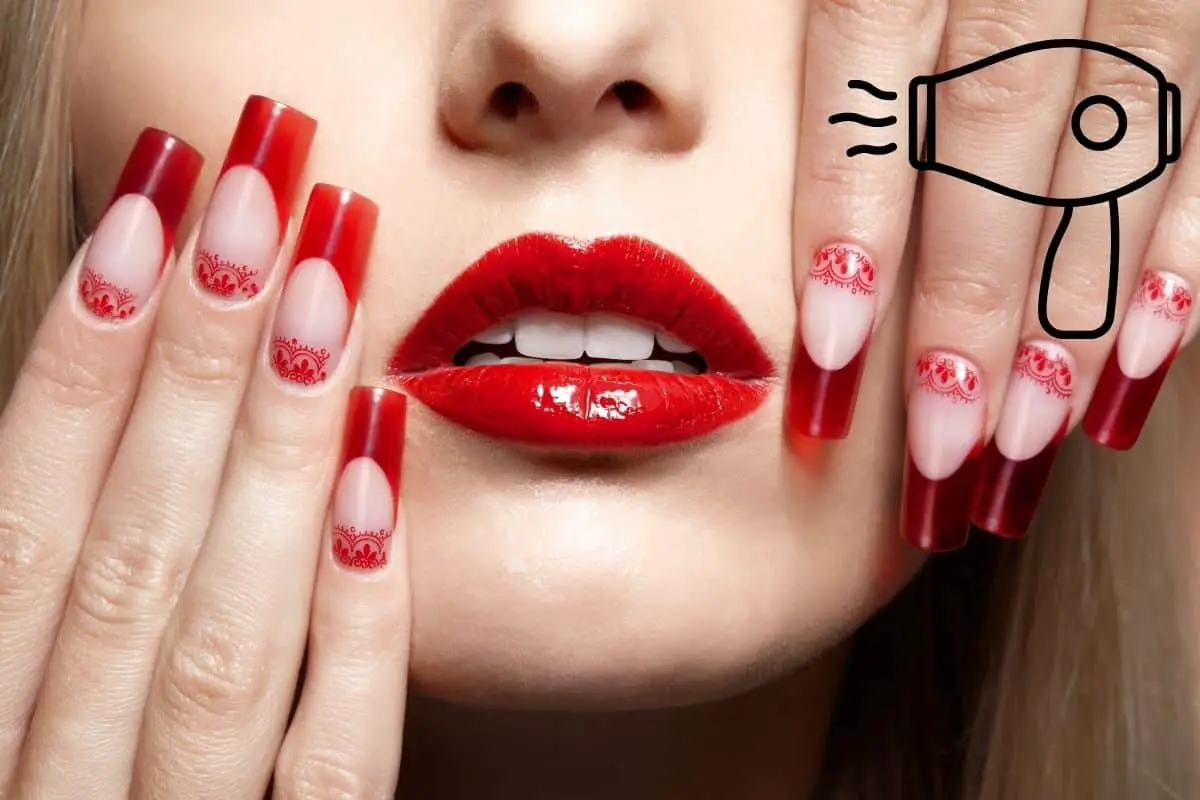
2. Use a Blow Dryer
Set your blow dryer to the lowest temperature and blow it over your nails. Run the dryer over your freshly polished fingers for up to 3 minutes and check if they have completely dried.
Always be sure to hold the dryer away from your fingers. Holding it too close might blow the polish away or completely damage it.

3. Use Ice Cold Water
This method sounds extremely unconventional, but it is highly functional. Fill a bowl with iced water and dip your polished fingers in it. Yes, it is easy to imagine that the water will run the polish off. It won’t and your fingers won’t freeze to death either in just 60 seconds.
For maximum results, let your fingers sit in the water for 2 minutes. The iced water ideally hardens the polish. You should, however, not place your fingers too soon in the bowl as your polish might be ruined.
4. Use the Air Duster
This is another air-drying method with cold compressed air. Since it shoots out the air in quick succession, hold it several inches so that it does not mess up your good polish. With this, your nails should be completely dry within 5 seconds.
It is more efficient than your regular air blow dryer. However, you should use this several minutes after application so that the polish will not be blown away.
")
5. Try the Regular Cooking Spray
This is another odd method but extremely effective. It is rumored that the oil in your cooking spray acts as the drying agent. It will dry out your stubborn nail polish in a matter of minutes and you will be ready to make use of your hands and fingers.
Just wait a few minutes after the application. Hold the cooking spray 1 foot away from the polished nails and miserly spray. The good part about this method is that your fingers will be moisturized at the same time.
5 Steps to Apply Nail Polish on Your Acrylic Nails
The million-dollar question every woman with zero experience with acrylic nails will ask is: Should the acrylic nails be worn straight from the box? Acrylic nails are versatile, and you can customize them to suit your deepest heart’s desire. If that still sounds like rocket science, follow these steps to decorate your acrylics and try to have fun while at it.

· Gather All the Necessary Tools
This is DIY straight up. You should have all the tools in one setting so that you are not distracted once you start. The most important ones are your acrylic nails and your favorite nail polish. If you are going to try complicated nail art, ensure that you have all the tools at hand. In that case, you should also consider bringing along your decals and stickers. You will also need cotton wool and nail glue to stick the acrylics on your nail beds.
 NYK1 Nail Bond Brush On Nail Glue For Acrylic Nails Long Lasting Acrylic Nail Glue Professional Nail Glue For Nails Glue")
· Ensure Your Acrylic Nails Are Prepped
Before opening your acrylic nails, ensure that your hands are thoroughly cleansed and germs-free. Arrange them in the order of shape and size of your natural nails. It is also wise to ensure that the size is correct before trying to glue them on your nail beds.
Some of these acrylics are already polished and all you need to do is to stick them on. Always use acetone-free wipes to prep them.

· Set Your Workspace
Ensure that your workspace has good lighting and is spacious. Choose a place where you cannot be disturbed and make it neat and well sanitized. Once your location is satisfactorily set, arrange all your DIY tools according to the order of use. Don’t overlap your tools.
Ensure that acetone-based remover does not come anywhere close to your acrylic nails. These two are sworn enemies and you don’t want another trip to the beauty supply store.
· Apply the Polish to Your Acrylics
Once everything is set and the coast is clear from any disturbance, get to work. Depending on what you have in mind, start by applying a base coat on your acrylic nails. There are base coats specially designed for these falsies, but the regular ones can do perfectly well.
Once the base is dry, apply your favorite color of nail polish in thin layers. Let the colors dry off and introduce a layer or two of your topcoat.

· Stick Them On
Once you have completed prepping your acrylic nails, give it time up to 24 hours max before wearing them. This will give them ample time to completely cure. Once ready, disinfect under the acrylics with acetone-free nail polish remover.
Stick them on gently with the nail glue. Once that is done, you may consider clipping and filing them to your desired shape and size.
Conclusion
DIY nail polish on acrylics can be a satisfying and fun pastime activity. This will even save you on money expenditure. To avoid messing everything up and running to the beauty supply store again, carefully read all you need to know about polishing and fixing your acrylic nails. Things are even easier these days with YouTube DIY videos.
If the nails are falling off you can read an article on how to prevent it here.
SOURCES:
- Using Nail Polish on Acrylic Nails: A How-To Guide
- How to Dry Nail Polish Quickly: 8 Steps (with Pictures)
MakeupRestart.com is a participant in the Amazon Services LLC Associates Program, an affiliate advertising program designed to provide a means for sites to earn advertising fees by advertising and linking to Amazon.com. We also participate in other affiliate programs which compensate us for referring traffic.
Leave a Reply