This post contains affiliate links.
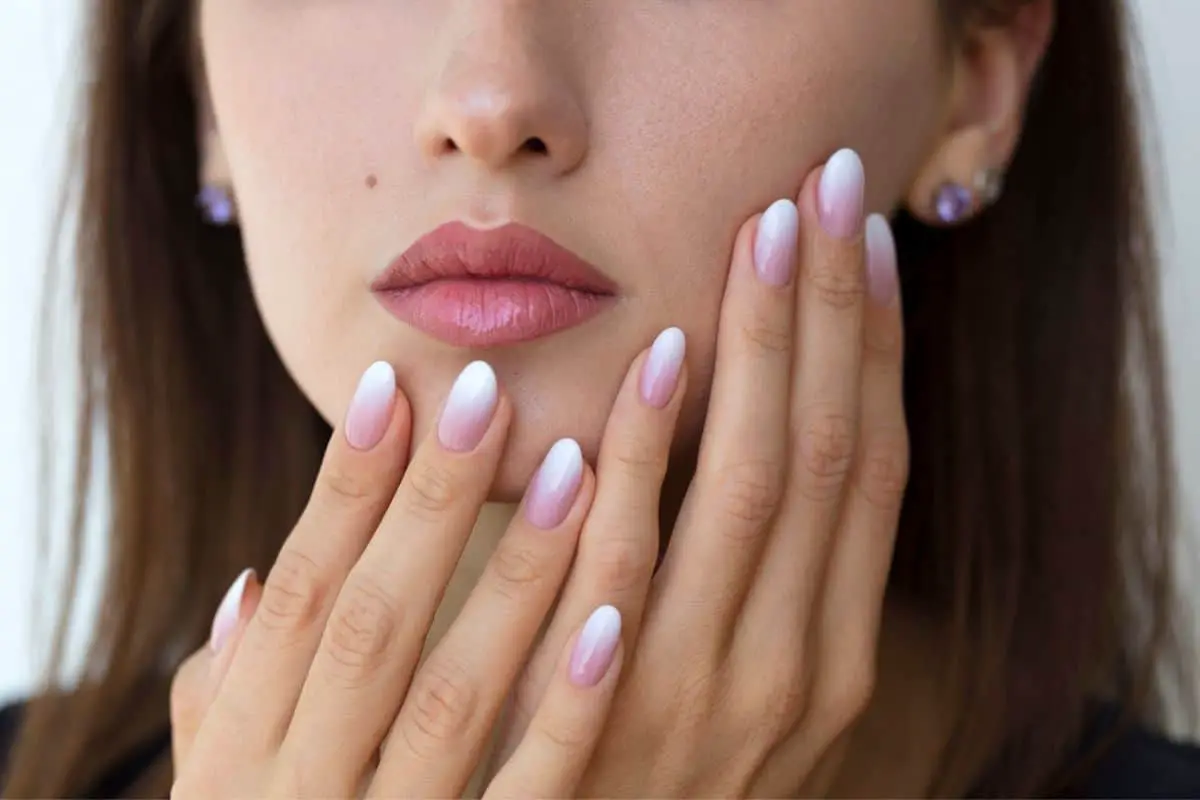
A couple of years ago, social media was taken by storm by a new trend called “Ombré”. What began as a hair trend is now influencing every market as Ombré can be found on clothes, shoes, handbags, hair, and, of course, nails! So, I have provided a guide on how you can do Ombré nails with gel polish
To achieve Ombré nails, you will need at least two different colors to place on your nails. Place one color from the midpoint toward the cuticle of your nails then place the other from the midpoint to the tip of your nails. Then use a clean Ombré brush to blend the colors in one direction, from darker color to lighter color.
I will give you a complete guide on how to get the Ombré nails like a pro using gel nail polish. I will also provide you with different methods to achieve it, tips to select a color, some dos, and don’ts, as well as some Ombré nails inspiration.
Table of Contents
How to Do Ombre Nails?
Ombré nails have been around for a very long time. Initially, this style was called “The natural”. Now along with Ombré, we hear words like gradient nails, baby boomer, fade nails, etc.
But don’t get confused. All of these are known to produce a similar effect, in which one color transitions into another.
When it comes to mixing shades there is no limit to what we can achieve. This is mainly the reason why everyone started to DIY the Ombré nail look. Many people failed, while many succeeded.
You can achieve the perfect Ombré look at home, without any professionals. All you have to do is follow some simple steps.
What you will need:
- A transparent base coat
- An opaque usually white or light pink base color
- Two to three gel nail polishes for an Ombré effect
- An Ombré brush or a sponge
- A top coat
- LED Lights for curing
- Nail barrier or liquid latex for easier cleanup
- Acetone

Choose The Method
There are several ways to get your perfect Ombré nails using regular nail polishes, acrylic colors as well as dip powders. In this guide, we will learn how to work with Gel polishes. They might be a little tricky to work with; however, they can be used to achieve one of the most beautiful-looking Ombré effects.
In this article, we will discuss the two most famous as well as efficient ways to get Ombré nails that include the use of gel polish.
Method 1: Using an Ombré Brush to create the Ombré nails
There are many available in the market. These brushes are specially designed for Ombré nails. They tend to be thick and dense in the bottom. Towards the end, they are delicate and extremely fine.
These brushes help avoid any bubble forming. Ombré brushes give a cleaner look compared to other methods that we will discuss later. If you are someone who has steady hands and prioritizes very neat and smooth Ombré nails, this method is perfect for you.
Step 1: Prepare the nail
First and foremost, you need to get rid of any previous nail polish that is on your nails. Clean your nails thoroughly with a nail polish remover. You want to get rid of any oils as well.
With that, buff your nails to remove the natural shine. Next, you need to push back your cuticles. You can go ahead and remove any dead skin using the cuticle remover if you are comfortable and you feel there is a need.
Step 2: Apply the base coat
Start with a clear base coat. You do not want to miss this step because of two reasons.
A base coat helps protect your nail, nourishes it as well as helps the nail paint to last a lot longer than usual. Cure the base coat for about 1 minute under the LED light. With that, you can go for another base color that is opaque white or light pink.
This step is optional however it makes a huge difference to the overall look. We recommend using a white base coat. This is because a white coat will make all the other colors that are used over it, pop.
Bonus Tip!
If you want to protect your natural nail bed and strengthen it, you can use builder gel. Use a thin layer and then cure that as well for a couple of seconds. All the filing and buffing you do after builder gel will protect your natural nail beneath it.
This step is completely optional as well. People, who have been doing at-home manicures for years, swear by this step as it has helped them keep their nails from breaking.
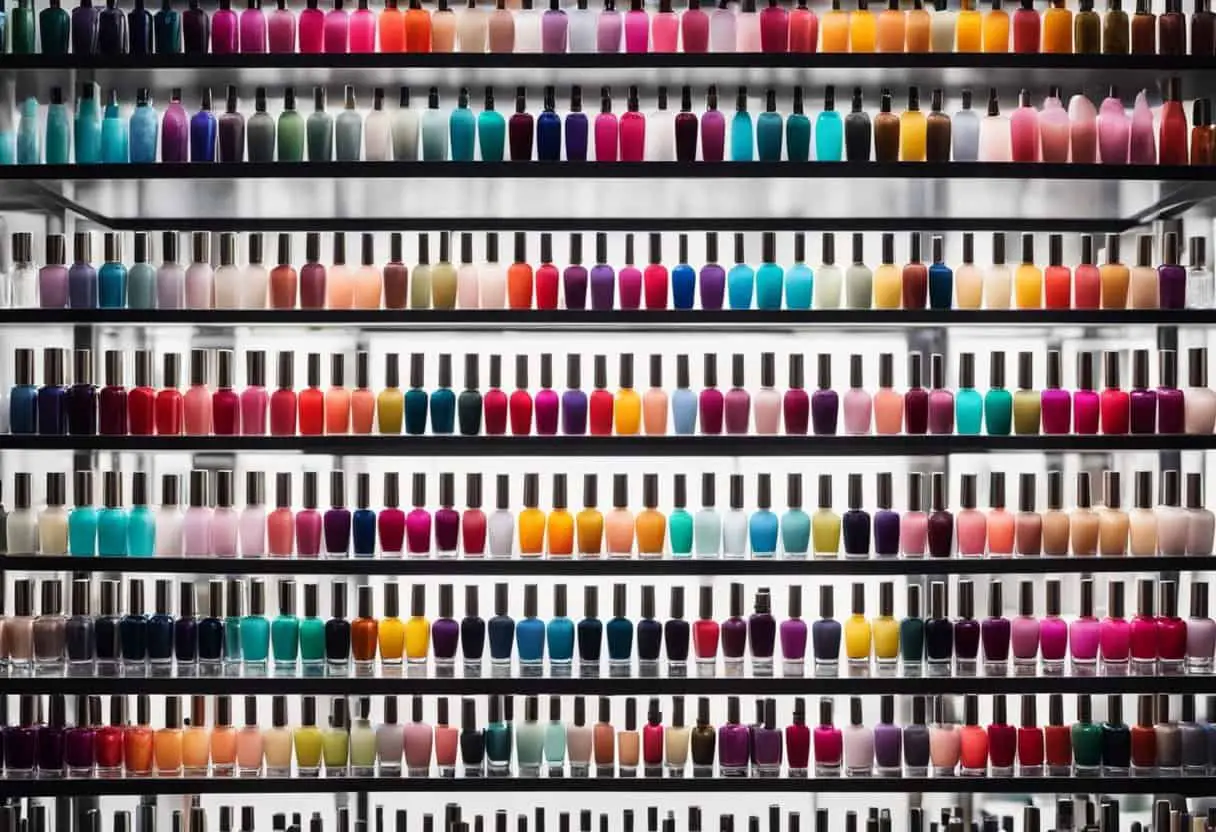
Step 3: Pick your gel polish colors
If you are a beginner, we recommend going with lighter colors.
Do the classic pink and white fade known as the French fade, if you are starting. You can go for glitter gel polishes too. They are easier to work with, especially with a brush.
Step 4: Paint the nails
Apply one shade on the nail from top to halfway down the nail. You can apply a second color that is the darker color on the tip.
Remember!! DO NOT cure after this step as you have to blend the colors.
Step 5: Blend with the brush
Take your Ombré brush and lightly bring the color that is on the tip upwards and towards the cuticles. Do not rush! You have to use very light strokes.
Keep cleaning the brush while you are blending the darker shade. With that, make sure your brush is dry and the bristles are separated and wispy. This takes time so we recommend you pick a day when your patience level is high! Lastly, cure them.
Step 6: Finish it off with a topcoat
Use your favorite top coat to seal and blend everything in.
Method 2: Using a sponge to create Ombré nails
Step 1: Prepare the nail
Cut your nails to the desired length, file them and remove the dead cuticle skin. Do all the steps required to get the nail bed ready.
Step 2: Apply the base coat
Use clear coats as well as colored coats. Nail artists suggest you use the base coat even if your nail polish has a base coat added to it.
Step 3: Cut the sponge according to your desired size and shape.
Try your best to cut the sponge in the shape of the nail to avoid messing up the surrounding areas. But don’t worry you can always clean the skin later.
Extra Tip*
To avoid mess use nail barriers. They come in different types. You can use tapes as well as liquid latex that can be peeled off later.
Step 4: Select your colors and apply them to the sponge
Now take your sponge and apply two layers of your favorite gel nail polishes.
Both stripes need to be applied parallel to each other. While applying, make sure the stripes are thin or thick according to the size of your nail. Do a rough measurement.
I recommend applying thick layers simply because you have a barrier and you can clean the surroundings later. If you are using three colors put the lightest shade first, and then apply the darker shade and finally the darkest. The edges of every stripe should connect.
There can be a slight overlapping as well. This will help create a smooth transition on the nail. Finally, make sure that the gel polish is not wet but a little dried. When the colors are a bit absorbed in the sponge, that’s when you know you start your next step.
Step 5: Blot the sponge on the nail.
It is time for the most fun part of the whole process i.e. blotting the colors onto the nail. Dab it gently till you see the colors are being transferred. Repeat the steps a couple of times.
Let the nail color dry, then go ahead and apply the nail paint on the sponge and repeat the process. You might want to do it a couple of times until you get your desired color. You can press a section of the sponge on the nail to get that color.
Just play around until you get exactly what you initially visualized. Make sure you let the nail dry before you put another layer. Cure the nail in between intervals.
Tip: Wet the sponge and remove excess water. Apply the colors on the wetted sponge. We do this because the sponge tends to absorb the nail paint leaving nothing to be transferred.
Furthermore, a dry sponge can take off the previous layer. To avoid that, we use a wet sponge to achieve a flawless layer.
Step 6: It is the Time for the Top-Coat!
Let’s agree on the fact that this step is the most satisfying step among all the others. This is when you apply a top coat and see all the colors blending in leaving a smooth and seamless finish. You can apply two layers of topcoats if you wish to.
There you have your glossy and shiny Ombré nails.
A Simple Guide for Selecting Colors
When starting with this trend, we advise you to go for light colors as they are easier to blend and mistakes are likely to be hidden. “Glitters are a great pick for beginners”- says professional nail technician Suzie from Nail career education. You can work your way to mixing darker shades when you get the grip on the basics.
Although there are no boundaries on how creative you can be when picking colors, we recommend keeping the color theory in mind. Pick colors that are closer to each other on the rainbow. Or pick two shades that add up and become a different color that you prefer.
For summers, people tend to go for neon shades as well as light-toned colors. On the other hand, dark shades such as maroons, black, and navy blue tend to be popular during winters. Matte shades are also preferred during the cold season.
You can go for glittery gold and silvers for festivals like New Year. Reds are perfect for Christmas. You can even go a step ahead and decorate your nails by adding pearls.
You can create designs like stars and dots with a thin brush. You can also make your nails sparkly by sticking glitter chunks onto them with help of a topcoat.
Tips to Make Your Ombré Nails Last Long
Do you ever take hours to do your nails only to see them chirp by the end of the day? Do you spend dollars on the expensive Ombré nails and not even get to enjoy it for a week? We all have been there!
Do not worry. We have gathered 10 tips from professionals so there is no room for mistakes. These tips can help your Ombré nails to last longer than usual. Here is all you need to do.
1. Never skip the base coat. Basecoat helps your nail from all sorts of damage. It protects, strengthens as well as helps your nail paint to last longer than usual.
2. Make sure you wait between applying coats. Letting the layer dry ensures that it will last.
3. Do not file, buff, or trim your nails after you have got Ombré nails done. Any action like that can lead to the chipping and peeling of the nail paint.
4. Use gloves when doing household chores like washing dishes. The chemicals present in dishwashing soaps can break the formula of the nail paint.
5. Condition your nails by using cuticle oils. If you leave your nails and let them dry for days, they are likely to become weak. We recommend using oils around your nails before going to bed every night.
6. Reapply your topcoat after a couple of days to make your Ombré last for up to two weeks.
7. Seal the edges by running the nail paint in a horizontal direction across the tip. This will lock the nail paint and eventually it will prevent any kind of flaking and chipping of the gel nail polish.
8. Buffing your nails before applying nail paint is another great tip to make your nail paint last. The reason why buffing helps is it removes extra dead skin above the nail leaving the nail bed smooth and even.
9. Avoid exposure to extremely hot water.
10. Lastly, gel nail polish does not stick to the skin. This is why you need to make sure your gel nail polish is only over the nail. In case you get any of it on the skin. Remove it with a brush that is dipped in acetone.
Some Dos and Don’ts To Remember
1: For easier cleanup use liquid latex around the nail. When you are done with the whole nail look, you can simply peel the liquid latex as they are peel-offs. Some people swear by Elmer’s glue. However, we recommend you use peel-off liquid latex to not mess up your at-home nail art experience.
In addition to liquid latex, nail barriers such as tapes are available across all stores. They are cut in a shape that fits the sides of your nail. Some of these are also reusable, so you are saving the planet while getting your favorite Ombré nails!
2: Use a brush dipped in acetone instead of using cotton swabs. This is mainly because cotton from the cotton swab can stick to the sides of the nail. Carefully clean the edges with acetone dipped brush. Apply your favorite oil on the cuticles at the end.
3: Always pick two to three colors for Ombré nails. You can use 4 to 5 at the max. Using too many can mess up your nail art.
4: The best tip that you can get from any nail artist or any nail technician is to always let the coat dry before using another one. You are advised to cure your nails for up to 1 minute between every step when doing Ombré nails.
If you don’t have LED lights, you can air-dry your nails for about 3 minutes before rushing to the next step. If you don’t keep this in mind, you will be left with messy nails that are far from what we call Ombré nails.
5: Do not sponge your nails excessively. To have a smooth gradient effect, follow the tips and timings mentioned above regarding creating Ombré nails with a sponge.
6: Let the paint dry on the sponge before putting it onto the nail. If the nail paint is dripping or is sitting on the surface of the sponge it will transfer to the nail. This will not lead to the Ombré style.
7: During every interval, dab the sponge only a couple of times. When we are using gel nail polish, we must ensure this at all costs. Gel polish tends to pick up the previous layer from the nail way easier than any other nail polish.
8: Use hard sponges instead of soft ones. Soft sponges might leave small sponge residues on the nails. We recommend Latex-free foam cosmetic wedges. They have 32 wedges that will cost you only $1.79.
Bonus Tip: If you are a beginner and want Ombré nails with the help of a sponge, you can follow these 2 steps that make the process a lot easier.
- Apply one color all over your nail, for example, blue.
- On your sponge apply a different color, followed by the color on the nail i.e. blue, and then another different color of your choice. This makes the blending easier as you are applying the base color again and in between the two shades that are supposed to transition into each other.
Some Ombré Styles To Try
1. French Fade Manicure
French Manicure has been around for years now, and honestly, we are bored. The clean-cut line on the nail that separates the white tip from the rest of the nail used to be every girl’s pick. Not Anymore! We want you to try French Ombré, where instead of clean separation you create a seamless fade between pink and white.
This style has class and it is here to stay. With that, if you are a bride you should definitely try the French Ombré for your big day!

2. Pastel Please
From light blues to soft pinks, pastel Ombré nails give off an extremely sophisticated look. If you work at an office where there are rules regarding dress codes, you can totally rock a pastel Ombré. Place three colors i.e light blue, light pink, and light purple on a sponge and create your Ombré look that looks a little funky but for the most part of the time, it is elegant.
3. Glitter Ombré
We have talked about it before and we will talk about this again. If you want to try Ombré for the first time, glitter is the way to go!
If your glitter gel polish is dense and contains an enormous amount of glitter, you can attempt the Ombré using the Ombré brush method. If your glittering nail polish is somewhat transparent, however, experts suggest using a sponge. Because the sponge absorbs the nail paint, the glitters remain at the top.
A dense application can be achieved by packing that on the tip. In addition to this, you can use loose glitters and place them at different areas on the nail where the glitter from nail polish couldn’t reach. You can customize this Ombré with some rhinestones as well. It is festive, it is fun!
4: Sunshine Nails
Yellow is the color for the summer! If you are feeling like experimenting with colors that are not as famous when it comes to Ombré, try yellow! It is perfect for the holiday season.
5: Vertical Ombré
For this look, the steps are pretty much the same as discussed above in the guide. However, instead of placing gel nail polishes horizontally, we put them vertically. After you are done with your base coat, apply a thin vertical layer of one color on one side of the nail.
Use a different color on the opposite side; apply a thin layer of that as well.
Then, take a flat brush and dip one side of it in one and the other side in the other color. Now you have a brush that has two colors next to each other. Run the brush in the middle of the nail, that’s how you blend.
Cure your nails and finish it off with a nice thick layer of your favorite top coat.
How to Successfully Remove Gel Polish Without Damaging Your Nails
Since you have decided to achieve a full Ombré gel manicure at home, we suppose you are ready for the DIY cleanup process as well. The first thing that many individuals would want to do is pick and rip their gel polish off. They have no idea that they are causing significant damage to their natural nails.
We have collected some pro tips for your successful gel polish removing experience that will lead to naked, healthy, and happy nails.
What you will need: A nail file, cuticle oil, acetone, cotton balls, aluminum foil, manicure sticks.
1: File the topcoat
Begin the process by filing the topcoat off. When you feel you are getting near to the natural nail bed, this is when you stop filing. Experts suggest “file just to get rid of the shine”.
2: Protect your cuticles with cuticle oil
Acetone is drying so therefore you want to protect your cuticles. In case, you do not have cuticle oil, you can use any other oil. We love jojoba oil. In addition to that, petroleum jelly works well too. So, there is no excuse to skip this step!
2: Soak in acetone
Now you may soak the cotton balls in acetone, and place them onto the nails. Lastly, wrap aluminum foil around your nails and let them sit for about fifteen minutes. Go longer than that, if the gel polish does not come off.
TIP: Wear a mask or be in a well-ventilated room. This is because you do not want any of the particles to make their way into your nose.
4: Manicure Sticks
Remove the polish with wooden sticks carefully. If all the gel polish is weakened, it should come off easily. If it doesn’t, repeat the acetone soaking process.
5: Be friends with Oils
Acetone can be harsh for your nails therefore you need to soak your nails in oils after you are done removing your gel nail polish. This will nourish them and eventually strengthen them as well.
Conclusion
Ombré nails are here to stay for a very long time. They are our favorite trend because they look very elegant and chic. Although they might look difficult to achieve, you can do them at home if you follow all the steps provided in this guide.
Sources
MakeupRestart.com is a participant in the Amazon Services LLC Associates Program, an affiliate advertising program designed to provide a means for sites to earn advertising fees by advertising and linking to Amazon.com. We also participate in other affiliate programs which compensate us for referring traffic.
Leave a Reply