This post contains affiliate links.
Dual forms of nails are prevalent in the manicure sector. You’re likely to find hundreds of videos online explaining how to use them. Dual forms make your work easy and fast, but your hard gel nails will not last long if care is not taken. There are many ways to use the dual forms. But can you use hard gel with dual forms?
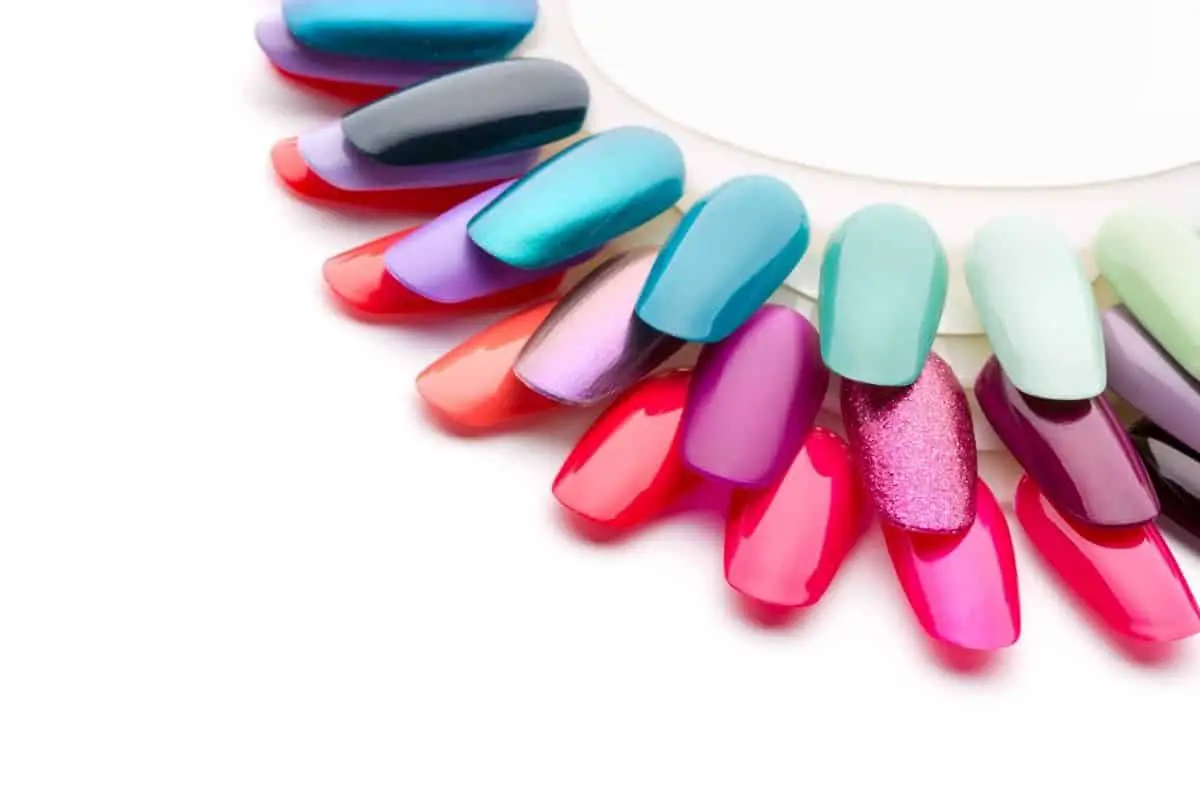
Looking at dual forms of nails, they appear like plastic nail tips. However, unlike the plastic ones, they are reusable and filled with acrylics or hard gels and then applied to the nails; you won’t need tips, glue, and paper forms. If you use them with hard gel, you get a magnificent arch.
The key to long-lasting hard gels is to know how to use them correctly. If you make your nail too thin, unfortunately, it will break before you know it. It’s frustrating to have your nails done, only to have them destroyed the next day. I carried out research to help you and other ladies learn how to use hard gels with dual forms correctly. Check the guide below on how to use dual nail forms with hard gels.
Table of Contents
How to Use Hard Gels with Dual Forms
Before I go to those steps, allow me to mention something about dual forms and hard gels. As I mentioned earlier, dual forms are designed to make your work faster and easy. They will save you a lot of filling time because they do not need much filling.
You need to address specific issues before you apply the hard gel with dual forms. Hard gels are so sticky, and they ruin and slip from the sides and flood the area of the cuticle. In addition, when applying dual forms on your natural nails, the area under the nail may need some filling using a nail drill.
Having mentioned that, I believe that you have known where your problem could be arising. So avoid them to get incredible, long-lasting nail extensions with hard gel and dual forms. Anytime I do my hard gel extensions with dual forms, I use the dual form and then use an overlay hard gel to strengthen the nail stress points. The reason behind this is that hard gels are not long-lasting.
Another thing is that you can apply the dual form on tips and by doing so, you will save filling under the nail.
Step 1: Select the hard gel you need to use
Many brands of hard gel exist, including Gelish poly gel and young nails hard gel. You can use the Gelish poly gel for dual forms because it doesn’t stick like the other brands, and for beginners, it would be less messy.
Step 2: Prepare the nails.

Push the cuticles gently [with an orange stick or a cuticle pusher] back and efficiently remove any dead skin of the nail plate. Then, remove shine from the surface of the natural nail gently using a nail file. When you are done removing the shine from the natural nail, use a cotton ball dipped in alcohol and wipe the nails to clean any dust. You can now apply a nail dehydrator and primer before you apply the hard gel.
Some hard gel brands do not use dehydrators and primers instead;, they use other products. Therefore it is essential to read the hard gel manufacturers’ instructions before applying the hard gel.
Step 3: Pick the right size of dual forms.
Fitting dual forms is tricky; you need to raise it a bit and make sure it fits from one sidewall to the other. The main reason for raising it is to save some space for the product to lie in it. Hold it and raise the free end for about 10 degrees angle. Ensure that all your nails have fitting dual forms.

Step 4: Apply hard gel to the dual form
You might need to apply the base gel for some brands of hard gel before you apply the hard gel itself. An excellent example of such a gel is the young nails hard gel. Take a bead of medium size with a gel brush and place it on the inner side of the dual form, gently move it and create the desired length of the nail. Fill the sides and make sure there is no product missing. Also, ensure that it is not too thin or too thick.
After gently preparing the dual forms to apply the hard gel to 2/3 of the nail and do not do the cuticle, cure in an LED lamp for about 60-120 seconds depending on the hard gel manufacturer’s instructions for usage.
Step 5: Hard gel overlay
Use a pinching tool gently on the sides of the dual form, and it will pop off. Then take a bead of the hard gel after removing the dual form and apply it to the nail and pillow the bead lightly as close to the cuticle area without touching it.
Bring it down gently to the tip and cure the nails with an LED/UV lamp for the second time. When the gel is set, take a cotton ball dipped in alcohol and wipe the nails carefully on the top and bottom.
Step 6: Shape and finish
Last but not least, shape the nails and finish. Do not forget to buff the surface if you want to use a gel top coat and cure. Apply cuticle oil as you finish.
The steps I have given above are not hard, are they? Very well. If you follow those steps carefully, you can rest assured that your manicure will last long. Also, select quality brands for quality results.
When hard gels are used with dual forms, they last long. With dual forms, the process is fast and straightforward, as I have explained above. Many people want to have a long-lasting manicure to avoid visiting salons frequently. Using hard gel with dual forms will save you the exercise.
I also never knew that hard gels could be used with dual forms, but my doubts were cleared after my research. I prefer hard gel with dual forms to other manicures. You too will discover that it is one of the best. It will give your nails an elegant look that other ladies will long to achieve.
Now that you have known that hard gels and dual forms work perfectly well, it is high time you tried it. I assure you that the results won’t disappoint you. Just follow the steps carefully and take caution.
Can You Reuse Dual Forms for Poly Gel?
Yes, you can reuse dual forms for poly gel. It’s because poly gel comes off the form completely when cured, and even if there are bits that stick to the form, you can still reuse it because you have to file your nails with the gel.
Just a simple explanation about the poly gel; it is a nail enhancement described as the hybrid formula known to combine the durability of acrylic nails and the elasticity application of gel nails. The materials and even the processes used in the manicure may actually differ.
The poly gel is a mixture of acrylic powder and clear gel. It also has putty-like consistency and is extremely easy to apply. The poly gel is the leading nail enhancement on the market currently. Their price depends on the type of poly gel application.
Poly gel manicures last for a period of up to 3 to 4 weeks. The longevity will depend on the length of your nail and your lifestyle. For example, if you are like me, then your poly gel manicure won’t last long. I engage myself every day with activities that are rough on my hands. This makes my poly gel nails stay for just a short period. Therefore I urge you to consider your lifestyle for the longevity of your poly gel manicure.
Reusable nail dual forms are actually prevalent as we speak. Probably you have watched many videos where people are reusing dual forms for poly gel. Dual forms will make your work super easy. Below I will provide some steps on how to apply the gel with dual forms.
- The first thing you do is to prep your nails to achieve long-lasting effects.
- When you are done with prepping the nails, apply a thin layer of base coat and cure for 60 seconds with an LED.
- Take your time to pick and choose the dual forms for all your fingers. Ensure you get the right size. It is vital to use the correct size.
- Squeeze or use a picker to place the poly gel onto the dual forms. Start with a bit of amount and keep adding whenever necessary.
- Wet your nail brush with alcohol or slip solution to form the poly gel smoothly. You cannot do without it when shaping the nails. You can use a basecoat instead if you don’t have alcohol.
- In this step, shape the poly gel and add more if needed until you achieve the desired thickness.
- Now place the form onto your nail and remove excess. Then cure for about 60 seconds.
- File and trim the hardened poly gel to the shape, length, and thickness of your preference.
- Lastly, don’t forget to apply a layer of topcoat to seal it from scratch.
As simple as that. Now you can decorate your nails to make them more pretty.
Why Do Poly Gel Nails Pop Off After Some Time?
They pop off too soon because the slip solution needs to be completely dry, so it does not interfere with the seal between the poly gel nails and the base coat. In addition, when these newly formed seals are still weak and need some time to set, they are subject to a lot of bending and curving from the action of shape filling of the nail tips.
Slip solution is alcohol-based. It is essential to prevent the poly gel from sticking to the nail brush while pressing the poly gel onto the dual form and into the desired shape. A small amount of the slip solution will tamper with the bond between the base coat and the poly gel and reduce their bonding strength. Poly gel nails with weak bond strength will eventually lift and break off the nail prematurely.
When you finish shaping the nails, please wait until you see all the slip solution dries off before pressing it on your nails.
Another reason why poly gel nails pop off is because of too much bending. The Action of bending the nails so much weakens the seals before they have time to set properly, and these loose seals will not keep the poly gel nails to stay on.
Insufficient basic nail preparation. You need to know the basic nail surface prep before you apply poly gel nails. This is to mean that;
- The nail surface has to be completely free of oily substances like oils or lotions.
- The nail surface has to be lightly buffed to remove shine.
- Apply nail dehydrator and ph balance solution and allow them to dry.
- Ensure you use the right base coat that comes with your poly gel nail kit.
Every type of artificial nail enhancement you put on your nails may be acrylics, dip powder, gel nails, or poly gel nails, and you must prep your nail surface properly. Failure to do that will waste the time and effort you put into creating them. Eventually, you will lose interest in the product you are using.
Solutions
- Ensure you allow all the slip solutions to dry completely.
- Have excellent shape-filling skills. This is to means that as you make your poly gel nails at home, you should know that your fast and strong filling action can weaken the poly gel bonds. Start to file your poly gel nails differently.
- Never force filing. The force exerted by the file can cause the poly gel nails to weaken and therefore break.
- Don’t file your nails using back and forth motion. It will lift up the new seal. Instead, move the file from one corner to the other in one direction in a repetitive manner.
- When doing it yourself, it is better if you put your nails at a corner of a table and file its shape from there. The table will provide support so that you can do it comfortably.
Why Do Poly Gel Nails Keep Breaking?
They will break if you don’t use the technique of applying poly gel on the dual form in a manner that the apex or the stress point where the free edges are. If they keep breaking at the tips, it means they are too thin.
The solution is to add more poly gel to make an apex and put more poly gel at the tips. After you do these, you will have thicker nails and a thicker apex at the end tips after you shape them.
Why Do Poly Gel Nails Keep Lifting?
The slip solution brings up this issue. If it doesn’t dry completely before applying the poly gel, it will pop off. Excess or too wet poly gel causes it to lift at the edges first. Always allow the slip solution to dry completely before you apply the poly gel on your nails. By doing so, you will solve the problem of lifting.
Also, too-long poly gel nails are subject to more stresses and bending. The forces weaken the chemical bond between nails and poly gel and cause them to lift. A solution to this would be to keep the nails at a reasonable length so that they don’t bend.
How Much Are Poly Gel Nails Worth?
These nails might be significantly more expensive than other manicures, but they are worth it. Poly gel nails don’t have chemical odors, and they are durable. If you bite your nails like me, why don’t you consider the poly gel nails? In addition, they quickly cure under LED or UV lamp for 60 seconds. Not to mention that they are comfortable and light to wear. They also won’t damage your nails.
Conclusion
Using hard gel with dual forms is a straightforward process. You only need to follow the prescribed instructions and take caution as you use them. Follow the above simple steps for incredible results, and you won’t regret it.
Also, you don’t have to dispose of your previously used dual forms. You can reuse dual forms for poly gel and get your nails looking beautiful. I have added some other information in this article about poly gels that would be helpful to you. Follow the guide above and take precautions to keep your nails long-lasting.
Sources
- Nailartgear: How To Use Reusable Dual Nail Forms Popits With Gel And Acrylics
- The Polished Mommy: Adding Length to Your Natural Nail Using Dual Forms and Hard Gel
MakeupRestart.com is a participant in the Amazon Services LLC Associates Program, an affiliate advertising program designed to provide a means for sites to earn advertising fees by advertising and linking to Amazon.com. We also participate in other affiliate programs which compensate us for referring traffic.

Leave a Reply